After Getting Married To a Japanese, Maiden Name No More, Hello Married Name
Since I got my zairyu card in January 2019, I was so eager and excited to use my husband's last name. First, you need to change your passport from maiden name to your married name. Remember, the name on your passport will be the same name on your identification cards and documents in Japan. So, if you came to Japan with your maiden name, definitely the documents and IDs such as the residence card, bank account, my number card, national health insurance card and etc. will be in your single name. That simply means, after you changed your name on your passport, you also need to change everything. Sadly, yes!
I highly encourage you to have an online appointment for your passport renewal at the Philippine embassy. Yes, it's possible to walk-in, however, you need to wait in line for a few hours, maybe. But if you have an appointment, you will be the first in line even if there are many people (walk-in) waiting for their turn. I spent like 20 minutes at the Philippine embassy from the verification of the requirements, payment and data capture. Here's the link to the online passport application .
My appointment schedule was on March 22, 2019, so the date of issue on my passport is March 23, 2019. Unfortunately, I received my passport on April 16, 2019. According to the PH embassy, it may take from 1-2 months before you can receive your passport.
Once you got your new passport, you can go to the city hall where you registered your marriage to change your name on your husband's Koseki Tohon. Don't forget to bring your old passport with you. The process of changing your name will take a week. Also, you need Koseki Tohon for the notification of a change in an item on the residence card, but it's okay if your maiden name is still used on the Koseki Tohon. It's like hitting two birds with one stone, going to the city hall to request for Koseki Tohon (for the notification of a change in an item on the residence card) and changing your name from maiden to married name on your husband's Koseki Tohon.
I went to the Immigration in Shinagawa on April 22nd to have my name on my residence card changed. You need to notify the immigration within 14 days after the change has been made (passport date of issue), if you failed to do it within the allotted time, they will ask you to write an explanation. My husband simply wrote that I received my passport on April 16, 2019. See this link for the list of documents needed.
On your new zairyu card, your address will be written in front of the card, so you don't need to go to the city hall where you live to have your address written at the back. However, when you move, you need to register your new address and that's the time when you will have the new address written at the back of your card.
So now, you're done with your passport, Koseki Tohon and residence card. You can now change your name on your bank account as well as the national health insurance card. In my case, since I'm just working as a part-timer, I'm covered with my husband's fuyou, he needs to inform his company about my change of name and they will send a new national health insurance card. Also, I informed my company about the change of my name by providing a photocopy of my zairyu card and passport.

application form, old zairyuu card, new passport, & queue number.
Actually, it's not hard to change EVERYTHING, you just need to exert effort.
Application for Change of Status of Residence in Japan: List of Documents
I already wrote about how I Got Married in Tokyo - zellechan’s diary and COE vs. Change of Status of Residence in Japan and How I Successfully Got my Zairyu Card - zellechan’s diary, so now, I want to share the list of documents that we submitted at Tokyo Regional Immigration Bureau in Shinagawa for my change of status of residence application. You could use this as your reference and you can submit as many documents as you want to prove your relationship or financial capability. You may also check this link for the official website of the Immigration Bureau of Japan.
1. Application form
After we reported our marriage at the Philippine Embassy in Tokyo, I started compiling the possible documents that we will need for my application. At first, we planned to apply for the Certificate of Eligibility (COE) so the application form that I printed out and filled up was for the COE. But after we got permission from the Immigration officer allowing us to apply for the change of status of residence, she gave us a new application form.
2. Questionnaire
This is the English version of the questionnaire, but you can print out the Japanese version if you want. In here, my husband filled this out in Japanese and I just wrote my family's information on page 7.
3. Letter of Guarantee
4. Photo of the applicant
The size should be 40mm x 30mm and must be taken within 3 months prior to your application date.
5. Passport
They won't take your passport when you apply for the change of status of residence but the immigration staff will stamp the application date.

6. Explanation letter
My husband wrote this in Japanese and he explained why we are applying for change status of residence, why he can't provide income tax certificate, the process on how we got married, the things that we did when I arrived in Japan for the third time.
7. My husband's payslips for the whole year with deductions such as tax, pension and etc. We decided to submit this because he can't get his income tax certificate from the city hall yet since he just started working in Japan last year.
8. Juminhyou or registry of my husband's current residential address.
9. Latest Koseki Tohon (Family registry) with my name as my husband's wife.
10. Reprinted the invitation letters we submitted on my previous visa applications. I guess being invited to Japan three times helped us a lot, we didn't need to do a lot of paperwork.
11. Reprinted the photos as proof of relationship that we submitted on my previous visa applications and added the photos that were taken during the current stay. Do not forget to include the photos on your marriage registration day at the city hall. There's a corner at the city hall that has "Happy Wedding" background wall where newlyweds can take their photos after the registration.
12. Report of marriage from the Philippine embassy
You can only get one original copy of your ROM from the embassy so it's up to you whether you will submit your only copy or not. We all know that it takes time before we could get a PSA copy of the ROM from the Philippines so I decided to ask the immigration staff if they can return our ROM and she said we can submit just a photocopy of it.
13. Screenshots of me and my mother-in-law's Line conversation as a proof that even if my Japanese is very poor, we don't have a language barrier because she can speak English, well, my father-in-law, too.
14. Cover letter
Whenever I apply for my visa I always submit a cover letter. Since there's no interview and I really want to express my clean intentions, I decided to write a letter in English. I explained why I am applying for the change of status of residence (actually what's written is COE but I didn't change it anymore), my daily routine while in Japan on a tourist visa, and the things I love about Japan.
We were not expecting that my application will be granted since we didn't do our best and the documents weren't perfect. Why?
1. There were some erasures on my application form. The staff checked and corrected it, she marked my mistakes with a highlighter then asked me to change or cross it out. What an untidy application form it was!
2. What's written on my husband's explanation letter was "applying for COE" so the staff told him to just cross it out then write on top "applying for the change of status of residence". It's the same as my cover letter but I didn't change it anymore. Another untidy document.
3. My husband filled out the questionnaire ahead of time with a pencil. So the night before we went to immigration, he tried to finalize it with a pen but didn't use a pen for the answers he wasn't sure. We were skeptical about what to write in some questions like how much support does he give me per month and the question about my mother tongue which is Tagalog. We communicate in English and he can't speak Tagalog so he was confused whether to write Tagalog or English as my mother tongue. He believed that he wasn't able to fill everything out with a pen and just realized it after we got home from the immigration.
4. My husband forgot to request for his employment certificate from his company and he couldn't provide his tax certificate.
But then, the result came out within 6 days! And until now we can't believe that I was able to get my zairyu card in less than 60 days stay in Japan. I came here on a 90-day tourist visa and now holding a one year resident status. I also want to share my timeline from my arrival to receiving my zairyu card.
November 27, 2018 - arrival in Japan, requested LCCM from the Philippine embassy in Tokyo
December 4, 2018 - received the LCCM
December 12, 2018 - marriage registration day
December 17, 2018 - got our latest Koseki Tohon
December 18, 2018 - reported our marriage at the Philippine embassy
December 28, 2018 - got the official copy of our Report of Marriage
January 17, 2019 - applied for the change of status of residence
January 22, 2019 - the immigration sent the postcard notification to us
January 23, 2019 - we received the postcard in our mailbox
January 24, 2019 - zairyu card claimed
Lesson learned: do not waste time.
COE vs. Change of Status of Residence in Japan and How I Successfully Got my Zairyu Card
According to my research and understanding, there’s a difference between the COE (Certificate of Eligibility) and change of status of residence. When you apply for COE while you are in Japan, it won’t let you stay in Japan till you get the result of your application. It simply means that you need to go back to the Philippines after your tourist visa expires. However, even if you are not in Japan, your husband can apply for your COE and once it’s granted, it needs to be sent to you in the Philippines then you need to apply for a visa with COE in an accredited travel agency. Please check Reli tours’ website for the list of requirements for the visa application with COE as reference. While applying for the change of status of residence from tourist will allow you to stay in Japan until you get the result of your application. On the other hand, 40 days after your tourist visa expired and you still don’t know the result of your application, you have to contact the immigration to check whether you can stay or leave Japan. Please see this notice for further information.
P.S I am not confident if I explained it well but I tried to recall what my husband told me about it.

But, there’s a trick, not everyone is allowed to apply for the change of status of residence, sadly. When we arrived at the immigration my husband just wanted to file for the COE simply because the line was long but I insisted to have a consultation first at the information counter. The staff at the information counter advised us to go to the 2nd floor D5 counter and ask permission if we can apply for it. If they won’t allow you, you don’t have a choice but to apply for COE. After handing over the documents that we prepared for the immigration staff at D5 counter, my husband told her that we wish to apply for a change of status of residence. She then checked our documents and my passport. She went back to us and gave back our documents placed in a plastic folder then gave us a sheet of paper and instructed us to get a number from another counter which means she was allowing us to apply for the change of status of residence. Yehey!

We waited long at the immigration before our number was called but it all went smoothly. Done, my application for change status of residence was accepted which means we only needed to wait for the result.

What we knew was the process would take up to three months and to our surprise, a postcard from the immigration where I wrote my name and address arrived in our mailbox after 6 days. Wow! It was incredibly fast.

You would know if your application is approved if there’s a check on the card saying that you need to buy revenue stamps of 4,000 yen (this amount is for the change of status).

We went to the immigration in Shinagawa, Tokyo the day after we got the postcard. It instructed us to go directly to the 2nd floor A1 counter. At the A1 counter, we submitted the required documents stated on the postcard which where:
Passport
Receipt
Postcard
4,000 yen revenue stamp
We got this number at A1 counter and again, you need to wait for your number to be called.

And of course, patience is a virtue. It took us probably 2 hours before we were able to get my residence card. Yes, finally, we got my zairyu card also known as residence card.


January 17, 2019 - application date
January 22, 2019 - the immigration sent the post card to us
January 23, 2019 - we received the postcard
January 24, 2019 - we claimed my residence card at the immigration bureau in Shinagawa
Here's my blog on how I Got Married in Tokyo - zellechan’s diary
I Got Married in Tokyo
After visiting Japan twice for 30 days each, I and my then fiancé decided to get married on my next visit to Japan. Mainly, the purpose of my third visit is to get married. Here's what we did.
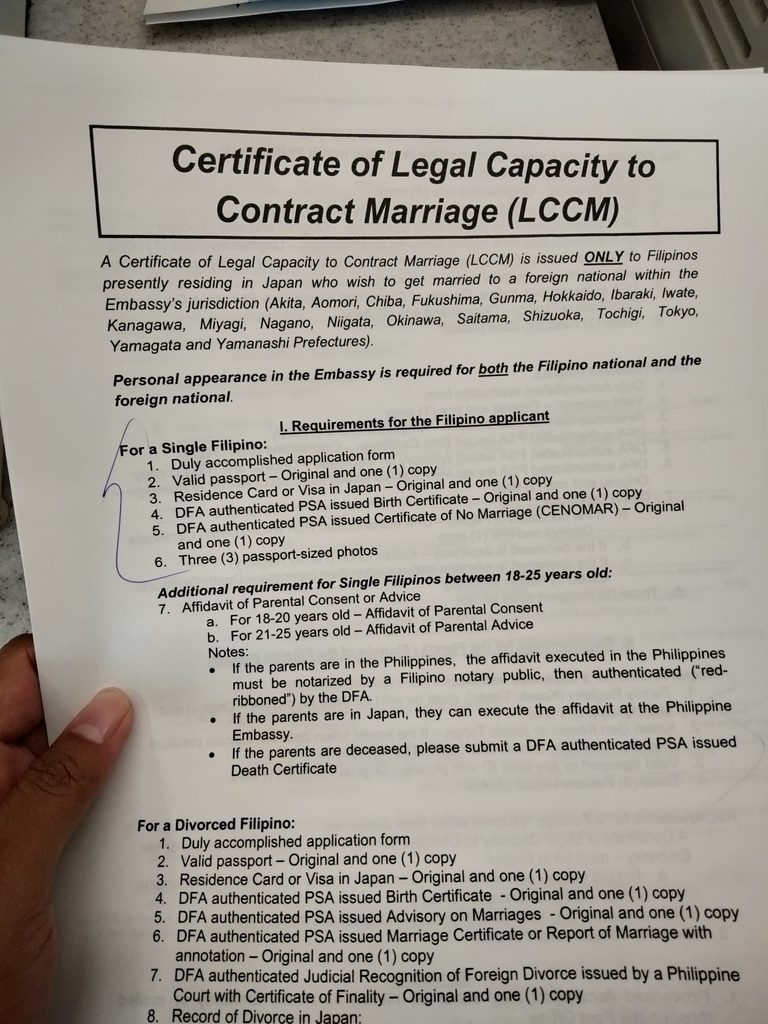
The first step is to apply for Legal Capacity to Contract Marriage (LCCM) from the Philippine embassy in Tokyo so we went to the embassy on the day I arrived. Check out this link
tokyo.philembassy.net to the list of requirements for LCCM then we received it after 7 days. The staff told us not to forget to register our marriage at the embassy after getting the new Koseki Tohon.
After receiving the LCCM from the Philippine Embassy, we prepared our documents for our marriage registration.

LCCM
I personally advise you to get the list from the city hall where you will register your marriage so that you will only prepare what’s needed. The requirements differ from each city hall; others require translated birth certificate and CENOMAR. We got married at Kita City hall in Tokyo and we didn’t need to submit my translated Birth certificate or CENOMAR. We were thankful that it was so easy to get married in Kita city hall because they only asked for our LCCM, our passports, and they gave us a form to write the details of my passport in Japanese, it’s like a translation. Then, tadaaa! Done, we’re married.
Now you’re married, the next step will be getting a copy of your husband’s Koseki Tohon (Family Registry) with your name as his wife. It took us 7 days to get it so we needed to wait for it before we successfully report our marriage at the Philippine Embassy. A copy of your ROM (Report of Marriage) will be delivered within 10 to 15 days.
Once you got your ROM, that’s the time that you can go to the immigration to apply for your COE (Certificate of Eligibility) or Change of Status of Residence.
To sum it all up, here are the keywords that you need to remember:
1. LCCM (Philippine Embassy)
2. Marriage registration (City hall)
3. Latest Koseki Tohon (With your name as your husband's wife) (City hall)
4. Report your marriage (Philippine Embassy)
5. Wait for the copy of your ROM
6. Immigration
After you get married, you also need to apply for either COE or change of status of residence, please do not hesitate to check this blog below.
zellechan.hatenablog.com
Good luck! And I hope this helps you. Thanks for reading ^^
Receiving documents for your visa from Japan to the Philippines
When applying for a Japan visa with a Japanese guarantor, your guarantor in Japan needs to send to you the documents that he prepared. On my previous notes, please see this link,
I mentioned that my boyfriend sent the documents to me thru EMS. You can actually track it online. Please see the photos below for more info.
Day 1: (Tuesday) 15:06 the documents were dropped at EMS office somewhere in Tokyo
Day 2: (Wednesday)
06:20 the documents departed the Tokyo export office
15:25 documents have arrived in Manila
Day 3: (Thursday) at around 11:30, they delivered it to my doorstep.
P.S
I paid 112 pesos. Probably its the delivery charge.
Here's the link to their website where you could track your parcel, https://www.ems.post/en/

You need to ask the sender the 13 digit item number which is composed of letters and numbers. This can be found on the form that the sender filled up and pasted on the envelope of your parcel (pls see the last photo).
Once you enter the item number, click track then you will see the status of your parcel. In this photo, my item was posted at 15:06.

The next day, my item has departed the export office in Tokyo already. (So fast![]() 😂)
😂)

On the same day, it arrived in Manila so I expected that I could get it the next day.

And finally, PhilPost delivered it to my doorstep! Yey! It arrived at around 11:30 A.M.

When sending the documents, you should give your complete details to your partner especially your contact number in case that PhilPost can't find your house, they could give you a call.
Complete name - I even asked my boyfriend to include my middle name
Complete address
Postal code/zip code - if you are not sure of your postal code, you can ask google ^^
Contact number

P.S
I am living in Las Pinas City, a part of Metro Manila and probably if you are living outside Metro Manila or in farther provinces, it will take some time to receive your documents. Someone told me, who is from Angeles City, Pampanga, she received her documents in 4-5 days.
I almost got offloaded at NAIA Terminal 1 because of these reasons..

First time traveling abroad? Please check this out why I almost got offloaded in my own country and how I was able to manage my situation.
- It’s my first time to travel abroad.
Well, I am not a traveller at all. I never thought that I could have a chance to go abroad since I am the breadwinner and the salary that I am earning is not enough for my family. The reason why I applied for a passport is simply because I want another valid ID LOL.
- I got a 30-day Japan visa.
30 days Japan visa is quite hard to get if you don’t have a lot of money and as a tourist, I think you cannot stay just in one country for 30 days. The reason why I was able to obtain a 30-day visa is because I have a Japanese guarantor. You don’t need to submit a proof of income or bank certificate to the embassy if your guarantor will shoulder all of your expenses going to Japan. So, I feel relieved because I don’t have money in my bank LOL. If you are wondering how I got my visa, please check this link, https://www.facebook.com/notes/hello-japan/i-got-a-30-day-visa-with-a-japanese-guarantor-yey/307234673115746/
- I have no company ID.
Yes, I don’t have a company ID since I have been working as a freelancer for the past 3 years. I can only request for a Certificate of Individual Contractor (COIC) from my company however, they will only send a soft-copy thru e-mail which I think won’t be useful at all since there is no dry seal or whatever proof that it is a legit document from my company.
After the immigration officer (IO) asked me about these things, she gave me a paper and asked me to fill it out then go to a room and have my interview. Honestly, I was really expecting that it would happen to me since I read a lot of blogs about traveling abroad, getting a Japan visa, and how to avoid getting offloaded. Luckily, I was prepared and the reason why I am going to Japan is simply to visit my boyfriend and meet his family, not to work. So there, the interviewer asked me why the IO asked me to have an interview, and I said because it’s my first time to travel abroad. First, she asked me the purpose why I am going to Japan and to show her my boyfriend and I’s photos. Unfortunately, here’s another reason why I almost missed my flight,
- I don’t have a smartphone.
Weeew! Yeah, I have no smartphone. I already mentioned that I am the breadwinner and my salary isn’t enough for my family, which means I can’t afford to buy a new smartphone. The interviewer was surprised to hear that I don’t have one and began to ask me more questions. Then, she decided to let me use the PC and log on to my Facebook account for me to prove that our relationship is real. My boyfriend and I went to some places in the South of Metro Manila and we had a few photos together uploaded on my FB. Only a few photos, because we wanted to make our relationship private and after this incident happened to me at the immigration, I realized that I need to upload more of our photos together.
- No credit card/s and passbook.
Sadly, it’s not easy to get a credit card here in the Philippines. I only have ATMs from different banks and I just told her that I can withdraw money from my ATM in Japan, which is true; however, I don’t have a lot of money in my account. LOL
Shout out to my loving boyfriend, if he didn’t call me on my mobile phone, the interviewer would not think that our relationship is real. He was so worried that I can’t fly to Japan because I sent him a text message that I need to have an interview with another immigration officer.
Lessons learned?
- I will buy a smartphone before I go back to Japan LOL.
- Company ID? Hhhmmm I don’t think I can have one since I am a freelancer.
- Be confident and do not tell a lie. They just want to know the real reason why you are going abroad.
- Try to look good, wear make-up and jewelries if you have, well, I don’t have so maybe that’s the reason why I almost got offloaded. IOs tend to judge passengers on how they look.
Disclaimer: This is just my personal opinion based on my personal experience ^^
I got a 30-day visa with a Japanese Guarantor! Yey!
Things to REMEMBER:
- Use only A4 size paper in ALL the documents
- Make reading a habit to get as much information you need. Search. Search. Search.
- Be patient! It’s not easy for the Japanese guarantor to make all the documents.
Here’s what me and my (Japanese) boyfriend did to get my Japan visa:
- He asked his father if he could be my guarantor since my boyfriend isn’t working in Japan yet. We did this because we both know that the money he earned working in Australia won’t be enough to support my stay in Japan. Luckily, his father is very supportive, so he agreed. Yey!
- We checked online all the requirements needed. In my case, since I am from Cavite, the nearest accredited travel agency is Reli Travel and Tours (SM Southmall branch) Here’s the link to their website: http://www.relitours.ph/en-visa.html
P.S. Please make sure to read everything, they also have sample application form in Tagalog.
- My boyfriend paid an agency in Japan to help him with the requirements. So, the staff from the agency checked all the requirements that my boyfriend and his father did to make sure that my visa will be approved. According to my boyfriend, he paid the agency 4 thousand pesos, though I am not sure if it’s a fixed rate or whatever.
My boyfriend’s father’s requirements:
- INVITATION LETTER FROM GUARANTOR IN JAPAN- The agency helped them to make a letter.
- GUARANTOR FORM- The form can be downloaded online and your guarantor should fill this up handwritten with his stamp.
- INCOME CERTIFICATE(Shotoku Shomei) from City Hall
- TAX RETURN CERTIFICATE with Gross Income (Nouzei-shomeisho: form 2) from Tax office.
- KAKUTEI-SHINKOKUSHO-HIKAE
- BANK CERTIFICATE(Yokin Zandaka Shomeisho)- Not everyone would like to show how much money they have on their bank accounts LOL
- RESIDENCE CERTIFICATE (JUMINHYO) of the FRIEND, ACQUAINTANCE and GUARANTOR IN JAPAN- Anyone in the family can get this. In here, all of the members in the family will be included on the list
P.S. If you are planning to stay longer in Japan, you need to make sure that your guarantor has a “huge” amount money in his bank or the salary he earns will be enough for you to stay in Japan. The embassy is measuring the guarantor’s financial capability thru the documents he’s going to provide therefore, it’s better if your guarantor could submit more than one document (numbers 3-6). As for my guarantor he gave me Income Certificate and tax return with gross income.
My boyfriend’s requirements:
- Invitation letter- Here, he explained how we met each other, what were the things we did together, the places we went to and things like that.
- Invitation form- Can be downloaded online as well.
- My daily schedule in Japan from day 1 till I go back to Manila.

- Proof of our relationship- We chose 6 of our photos from different places with different people that we spent our time with. It’s better if you could prove that you spent time with each other, so choose photos that was taken from different places. As for us, we went to Baguio, Batangas, Tagaytay, Bulacan together and he met my family, some of my friends and relatives. We also included the screenshots of our chats and text messages with the date and time because it would determine how long you have known each other.
- Hotel and flight booking (optional)- These are not required, however my boyfriend and I were very optimistic about the outcome of my visa application so he already booked my flight to Japan and hotel where we are going to stay in before he sent me the documents. We also included the reservations as part of my visa requirements.
P.S After making sure that the requirements are correct and complete, he sent the documents to me thru EMS. You can track online current location and status of your parcel. He sent it to me on Friday and I received it on Monday at around 5 P.M.
My requirements:
- Birth Certificate- You should submit the original copy and it should be issued within a year. I went to NSO serbilis in Pasay City and they release birth certificates within the day. Usually, releasing time is 1 hour, you can wait there. It costs 140 pesos.
- Photo- Your photo should be 45x45 or 2x2. Just tell the photo studio that it is for Japan visa. You need to make sure to write your complete name and date of birth at the back of your photo before gluing it to your application. Please put glue on all sides, not only in the middle and do not use scotch tape or staple wires.
- Passport- this is very important LOL. According to Reli’s website, broken passport is not accepted. Passports must be signed and must have at least two (2) blank visa pages.
- Visa application form- Again, you should print this out using A4 size paper. If you are not confident of your handwriting you can fill it out online then print once done. Make sure to fill the application form neatly, no erasures. Write N/A if not applicable, do not leave any blanks.
After I received the documents from Japan, I also made sure that my requirements are complete and correct. I even filled out my application form at home so when I arrived in Reli, I just handed all of the requirements to them and the Filipino staff checked first then endorsed it to the Japanese staff. I felt relieved when the Japanese staff said that my requirements are good to go. I paid 2,000 pesos for the visa.
Applying for the visa won’t take that long; however, preparing the requirements requires a lot of time and effort.
December 1- He sent me the documents from Japan thru EMS.
December 4- I received it at around 5 P.M.
December 5- I submitted all the documents to Reli, SM Southmall branch.
December 7- This was the issued date on my Visa.
December 8- I called them to check if my passport is ready for pick up but they asked me to call them back after the lunch break. I called them back at around 3:30 P.M. then they confirmed that my passport is ready for pick up.
Heads up: They will not tell you if your visa is approved or not, you need to claim your passport. Claiming is only until 7 P.M. I arrived there just in time because I went all the way from Cavite and there was a heavy traffic jam. I was nervous actually, I was thinking that if my visa is denied, my flight is non-refundable, but after seeing the looks of the Japanese staff while signing something before they released my passport, he smiled at me because he saw that my 30 days visa was granted. And finally, the Filipino staff asked me to sign their releasing sheet and told me that my visa is for 30 days and the validity is 3 months. I was like, “OMG, finally, I can go to Japan to visit my boyfriend and meet his family!”